If you’re still using two thumbs and getting outplayed in close-range fights, it’s time to switch to a 3-finger claw layout. Many pro and semi-pro players (including legends like SouL Regaltos and Fnatic Ronak in the past) relied on 3-finger setups to achieve lightning-fast movement, quick scoping, and smooth peeking while maintaining accurate aim.
The 3-finger claw gives you a massive advantage over default thumb players by allowing simultaneous actions: moving, aiming, shooting, and crouching/proning without lifting fingers. In 2026, with faster TTK and aggressive close-quarters meta, 3-finger layouts remain one of the best entry points before jumping to 4-finger claw.
Why 3-Finger Claw Works So Well
- Better mobility + combat control: Use left thumb for movement joystick, left index for crouch/prone/jump, and right thumb/index for aiming + firing.
- Faster reaction time in sprays, hip-fires, and quick peeks.
- Easier to master than 4-finger claw while still outperforming 2-finger setups.
- Suitable for most phone sizes (6–7 inches). Larger screens or tablets may need slight adjustments.
Many players report 20–50% improvement in KD after switching and practicing for 1–2 weeks.
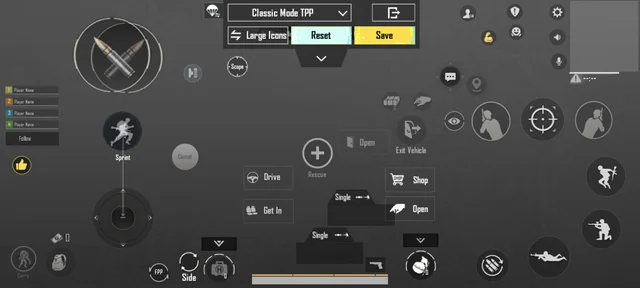
Recommended 3-Finger Claw Layout (2026)
The most popular and effective 3-finger setup places two fingers on the left side and one (or two) on the right.
Common Button Placement:
- Left Thumb: Movement joystick (keep it large and centered on the left).
- Left Index Finger (Claw position): Crouch, Prone, Jump, and sometimes Peek or Reload.
- Right Thumb: Fire button + Scope/ADS.
- Right Index Finger: Free look / Camera rotation or secondary fire button (for better spray control).
Popular Control Code (Global/PUBG Mobile): 6916-3084-8580-4664-088
This is a widely recommended starter 3-finger layout. Copy it directly in-game for a solid base.
How to Apply a Control Code:
- Go to Settings → Controls → Customize.
- Tap the layout slot you want to replace (usually the rightmost one).
- Select Featured or Import Layout.
- Enter the code and apply.
- Adjust button sizes and positions slightly to fit your hand and screen.
Pro Tip: Start with the default 3-finger preset in Featured layouts, then customize. Enable Toggle Quick Aim and Mixed Sight Mode for smoother transitions.
Best Sensitivity Settings for 3-Finger Claw (2026)
Claw players usually need lower ADS sensitivity than thumb players because of better precision and gyro support.
Recommended Starting Sensitivity (Non-Gyro / Low Gyro):
- Camera Sensitivity:
- 3rd Person No Scope: 140–160%
- 1st Person No Scope: 130–150%
- Red Dot, Holo, Aim Assist: 55–70%
- ADS Sensitivity:
- Red Dot: 50–60%
- 2x Scope: 40–50%
- 4x Scope: 25–35%
- 6x/8x Scope: 15–25%
- Free Look / Camera: 120–140% (helps with quick scanning)
Gyro Sensitivity (Highly Recommended in 2026):
- Enable Gyroscope → Always On or Scope On.
- Gyro ADS: Start at 300–400% and fine-tune.
- Many claw players lower scope sensitivities further when using gyro.
Sensitivity Code Example (Global): 6960-5068-1059-6336-109
Test these in the Training Ground or TDM. Adjust by 5–10% based on your device and playstyle. Claw setups often feel more precise, so reduce sensitivities slightly compared to thumb play.
How to Practice 3-Finger Claw Effectively
- Warm-up Routine (10–15 mins daily):
- Training Ground: Practice hip-fire sprays while moving and crouching.
- Quick scope drills with ARs and SMGs.
- Peek shooting (left/right lean while firing).
- Start Slow: Play Classic or TDM with bots first. Focus on muscle memory for 3–5 days.
- Common Adjustments:
- Make Fire button larger and place it where your right thumb rests naturally.
- Move Crouch/Prone buttons to easy reach for your left index.
- Enable Auto-Open Scope if you struggle with quick ADS.
- Common Mistakes to Avoid:
- Buttons too small or too far apart.
- Not practicing enough in real matches (muscle memory needs live pressure).
- Ignoring gyro — it pairs extremely well with claw.
3-Finger vs 4-Finger Claw – Quick Comparison (2026)
| Aspect | 3-Finger Claw | 4-Finger Claw |
|---|---|---|
| Learning Curve | Medium (1–2 weeks) | Steep (3–4 weeks) |
| Best For | Beginners to intermediates | Advanced & competitive players |
| Actions Simultaneously | Move + Aim + Shoot + Crouch | Move + Aim + Shoot + Crouch + Peek/Jump |
| Close Combat | Very good | Excellent |
| Recommended Code | 6916-3084-8580-4664-088 | 6974-6998-1946-2820-026 or higher |
Once you’re comfortable with 3 fingers, transitioning to 4-finger becomes much easier.
Final Tips for Success
- Play in a comfortable grip — use a phone cooler if your device heats up during long sessions.
- Customize button opacity and size until it feels invisible.
- Watch handcam videos of 3-finger pros on YouTube for visual reference.
- Update your layout after every major patch, as button responsiveness can change.
- Combine with good zero-recoil sensitivity and practice daily in TDM for fastest improvement.
Switching to a proper 3-finger claw layout can completely transform your gameplay. It takes patience and consistent practice, but the payoff in kills, wins, and smooth movement is huge.
Start today: Import a solid code, tweak sensitivities in training, and jump into a few casual matches. Within a week, you’ll wonder how you ever played with just two thumbs.
Good luck, and see you in the chicken dinner!