Switching to a 3-finger claw setup is one of the smartest moves for improving your gameplay in PUBG Mobile. It gives you much better movement, faster aiming, quick peeking, and the ability to shoot while moving — all without lifting your thumbs too much.
In 2026, the 3-finger layout remains extremely popular among mid-to-high level players because it offers a great balance between simplicity and speed. Many pros and aggressive players (including some who later move to 4-finger) start or stay with the optimized 3-finger claw.
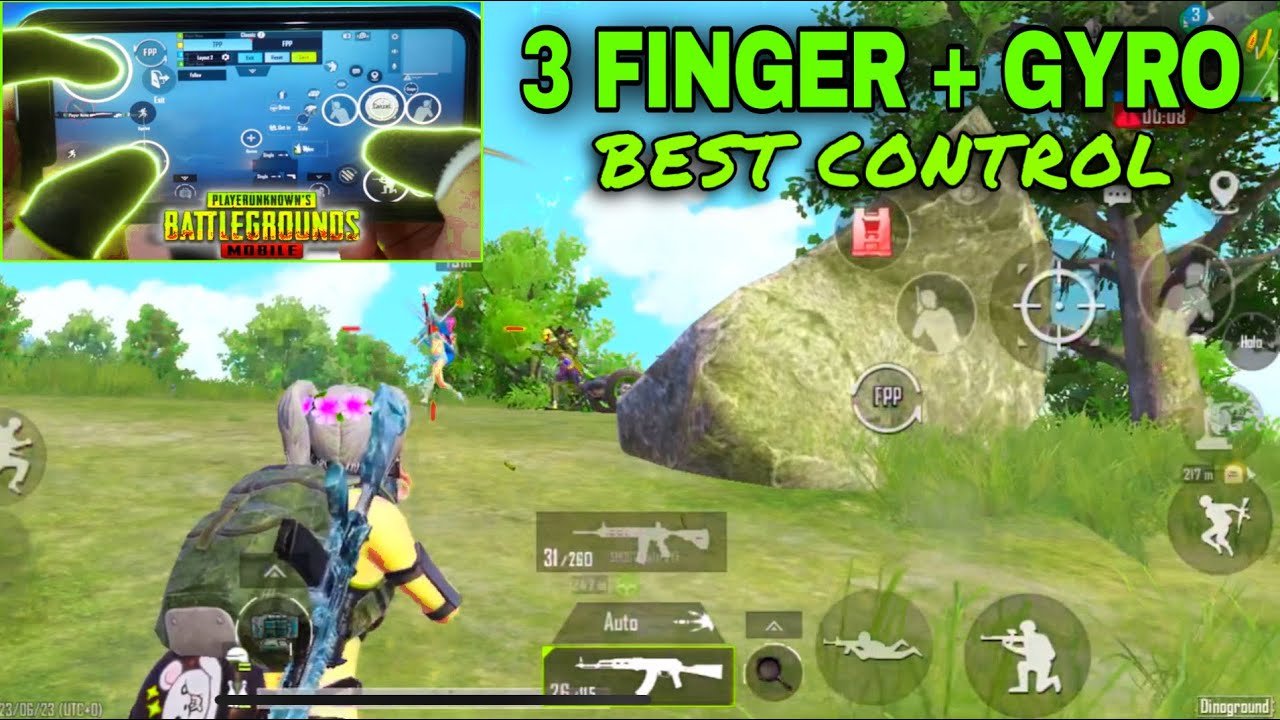
This guide covers the best 3-finger control layout, recommended button placements, how to set it up, sensitivity tips, and ready-to-use control codes.
Why Use 3-Finger Claw in PUBG Mobile?
- Allows simultaneous movement + aiming + shooting.
- Faster hip-fire and close-range fights.
- Better control during jumps, crouch peeks, and quick scoping.
- Easier transition from 2-finger without overwhelming your hands.
- Still very effective in both TPP and FPP modes.
Finger Assignment (Standard 3-Finger Claw):
- Left Thumb: Movement joystick + crouch/prone.
- Right Thumb: Camera control / aiming + scope switching.
- Left Index Finger (Claw): Fire button (placed on the upper left side of the screen).
Some players use right index for fire instead, depending on hand size and comfort.
Best 3-Finger Control Layout Setup (2026 Recommended)
Step-by-Step Customization:
- Open PUBG Mobile → Go to Settings → Controls → Tap the layout icon on the right.
- Select an empty layout slot.
- Tap Featured → Choose 3-Finger (or Classic 3-Finger if available).
- Now customize button positions and sizes.
Recommended Placements for Aggressive Play:
- Movement Joystick: Lower-left corner (slightly bigger for comfort).
- Fire Button: Upper-left area (reachable by left index finger) — make it large (120-150% size) for easy tapping/holding.
- Aim / ADS Button: Upper-right or near center-right (right thumb).
- Crouch / Prone: Near movement joystick or bottom-center (easy for left thumb).
- Jump: Bottom-right or near right thumb.
- Peek (Lean): Place left and right peek buttons on the sides for quick 6-9 peeking.
- Scope Buttons: Keep 2x, 4x, etc., accessible near the right side.
- Reload, Grenade, Meds: Group them on the right side without overlapping.
Pro Tips for Layout:
- Make the fire button slightly transparent and larger so it doesn’t block your view.
- Keep important action buttons (shoot, aim, crouch) within easy reach without stretching your fingers too much.
- Test in the training ground and adjust sizes by 5-10% until it feels natural.
- Enable Mixed mode for crouch/prone if you play with fewer fingers (tap for crouch, hold for prone).
Many players also add a second fire button on the right side for double-tap spraying or shotgun one-taps.
Best Sensitivity Settings for 3-Finger Claw (2026)
3-finger players usually need slightly higher camera sensitivity but lower ADS sensitivity for better control.
General Starting Point (Adjust according to your device and playstyle):
- Camera Sensitivity (Free Look): TPP 130-150%, FPP 110-130%
- ADS Sensitivity:
- No Scope / Red Dot: 55-70%
- 2x Scope: 40-55%
- 4x Scope: 25-35%
- 6x / 8x Scope: 15-25%
- Gyroscope Sensitivity (if using Gyro): Start at 300-400% and fine-tune.
Recommended Sensitivity Codes (2026):
- One popular combo: Sensitivity Code 1-7571-6743-7862-8239-223 (inspired by fast 3-finger players)
- Another solid starter: Layout Code 6916-3084-8580-4664-088 + Sensitivity 6960-5068-1059-6336-109
How to Apply Codes:
- Go to Settings → Controls → Tap the cloud/upload icon.
- Enter the Control Code or Sensitivity Code.
- Save and test in training mode.
Note: Sensitivity is personal. Start with these codes, then adjust in small increments (5-10 points) while practicing spray control and tracking.
How to Practice 3-Finger Claw Effectively
- Spend 15-20 minutes daily in the Training Ground focusing on:
- Moving + shooting while strafing.
- Quick crouch peeks while firing.
- Hip-fire sprays and quick-scoping.
- Play TDM or Payload mode for fast reflexes practice.
- Record your handcam (optional) to check finger positioning.
- Give yourself 1-2 weeks to get fully comfortable — muscle memory takes time.
Common Mistakes to Avoid
- Placing buttons too far from natural finger reach (causes fatigue).
- Making fire button too small or too transparent.
- Using very high sensitivity too early (leads to shaky aim).
- Ignoring gyro — combining gyro with 3-finger gives huge advantage in mid-range fights.
Final Tips for 2026
- If your phone has a high refresh rate (90Hz or 120Hz), enable it for smoother control.
- Use a good cooling setup or claw grip phone holder for long sessions.
- Once comfortable with 3-finger, you can gradually add a 4th finger (right index for fire or scope) for even faster reactions.
- Always warm up in training before ranked matches.
A well-optimized 3-finger layout can dramatically improve your close and mid-range fights, helping you climb ranks faster. Start with one of the popular codes above, customize it to your hand size, and practice consistently.
Try this setup today and watch your kills and survival rate improve!